
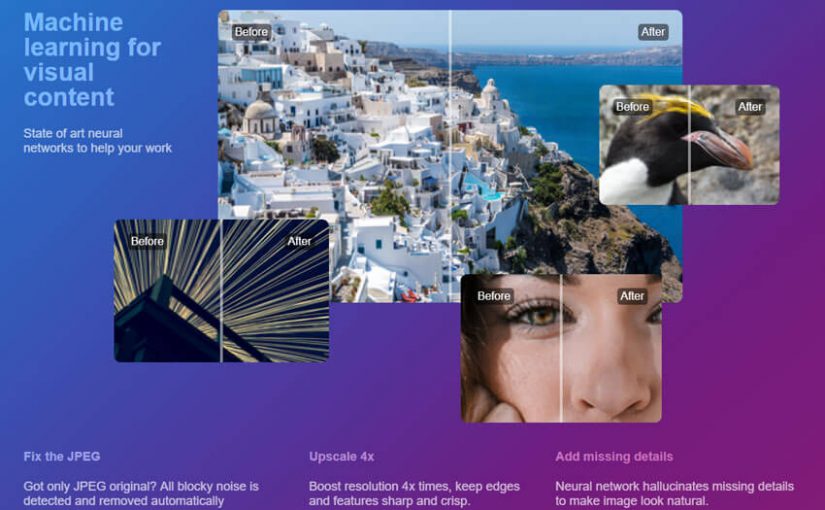
Free service to upscale and improve your photos and images using state-of-art neural networks. Image upscaling supercharged. Remove JPEG artifacts, upscale 4X, preserve quality. One-click and free.
Dubbed as a “neural network image super-resolution and enhancement” service, Let’s Enhance got me super-interested, I had to give it a test since it’s free to try anyways.
How to Use
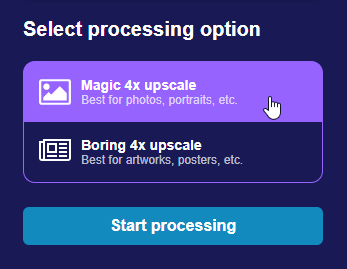
Using the web-based app is quite simple. You just go to their website https://letsenhance.io/ and drag-and-drop your image in it (or use the file select option).
You are then presented with two options – Magic for photos, portraits and other highly detailed images; and Boring for artworks, posters, and perhaps vector-type graphics.
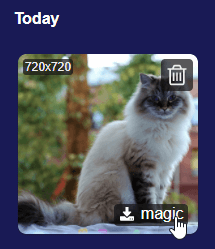
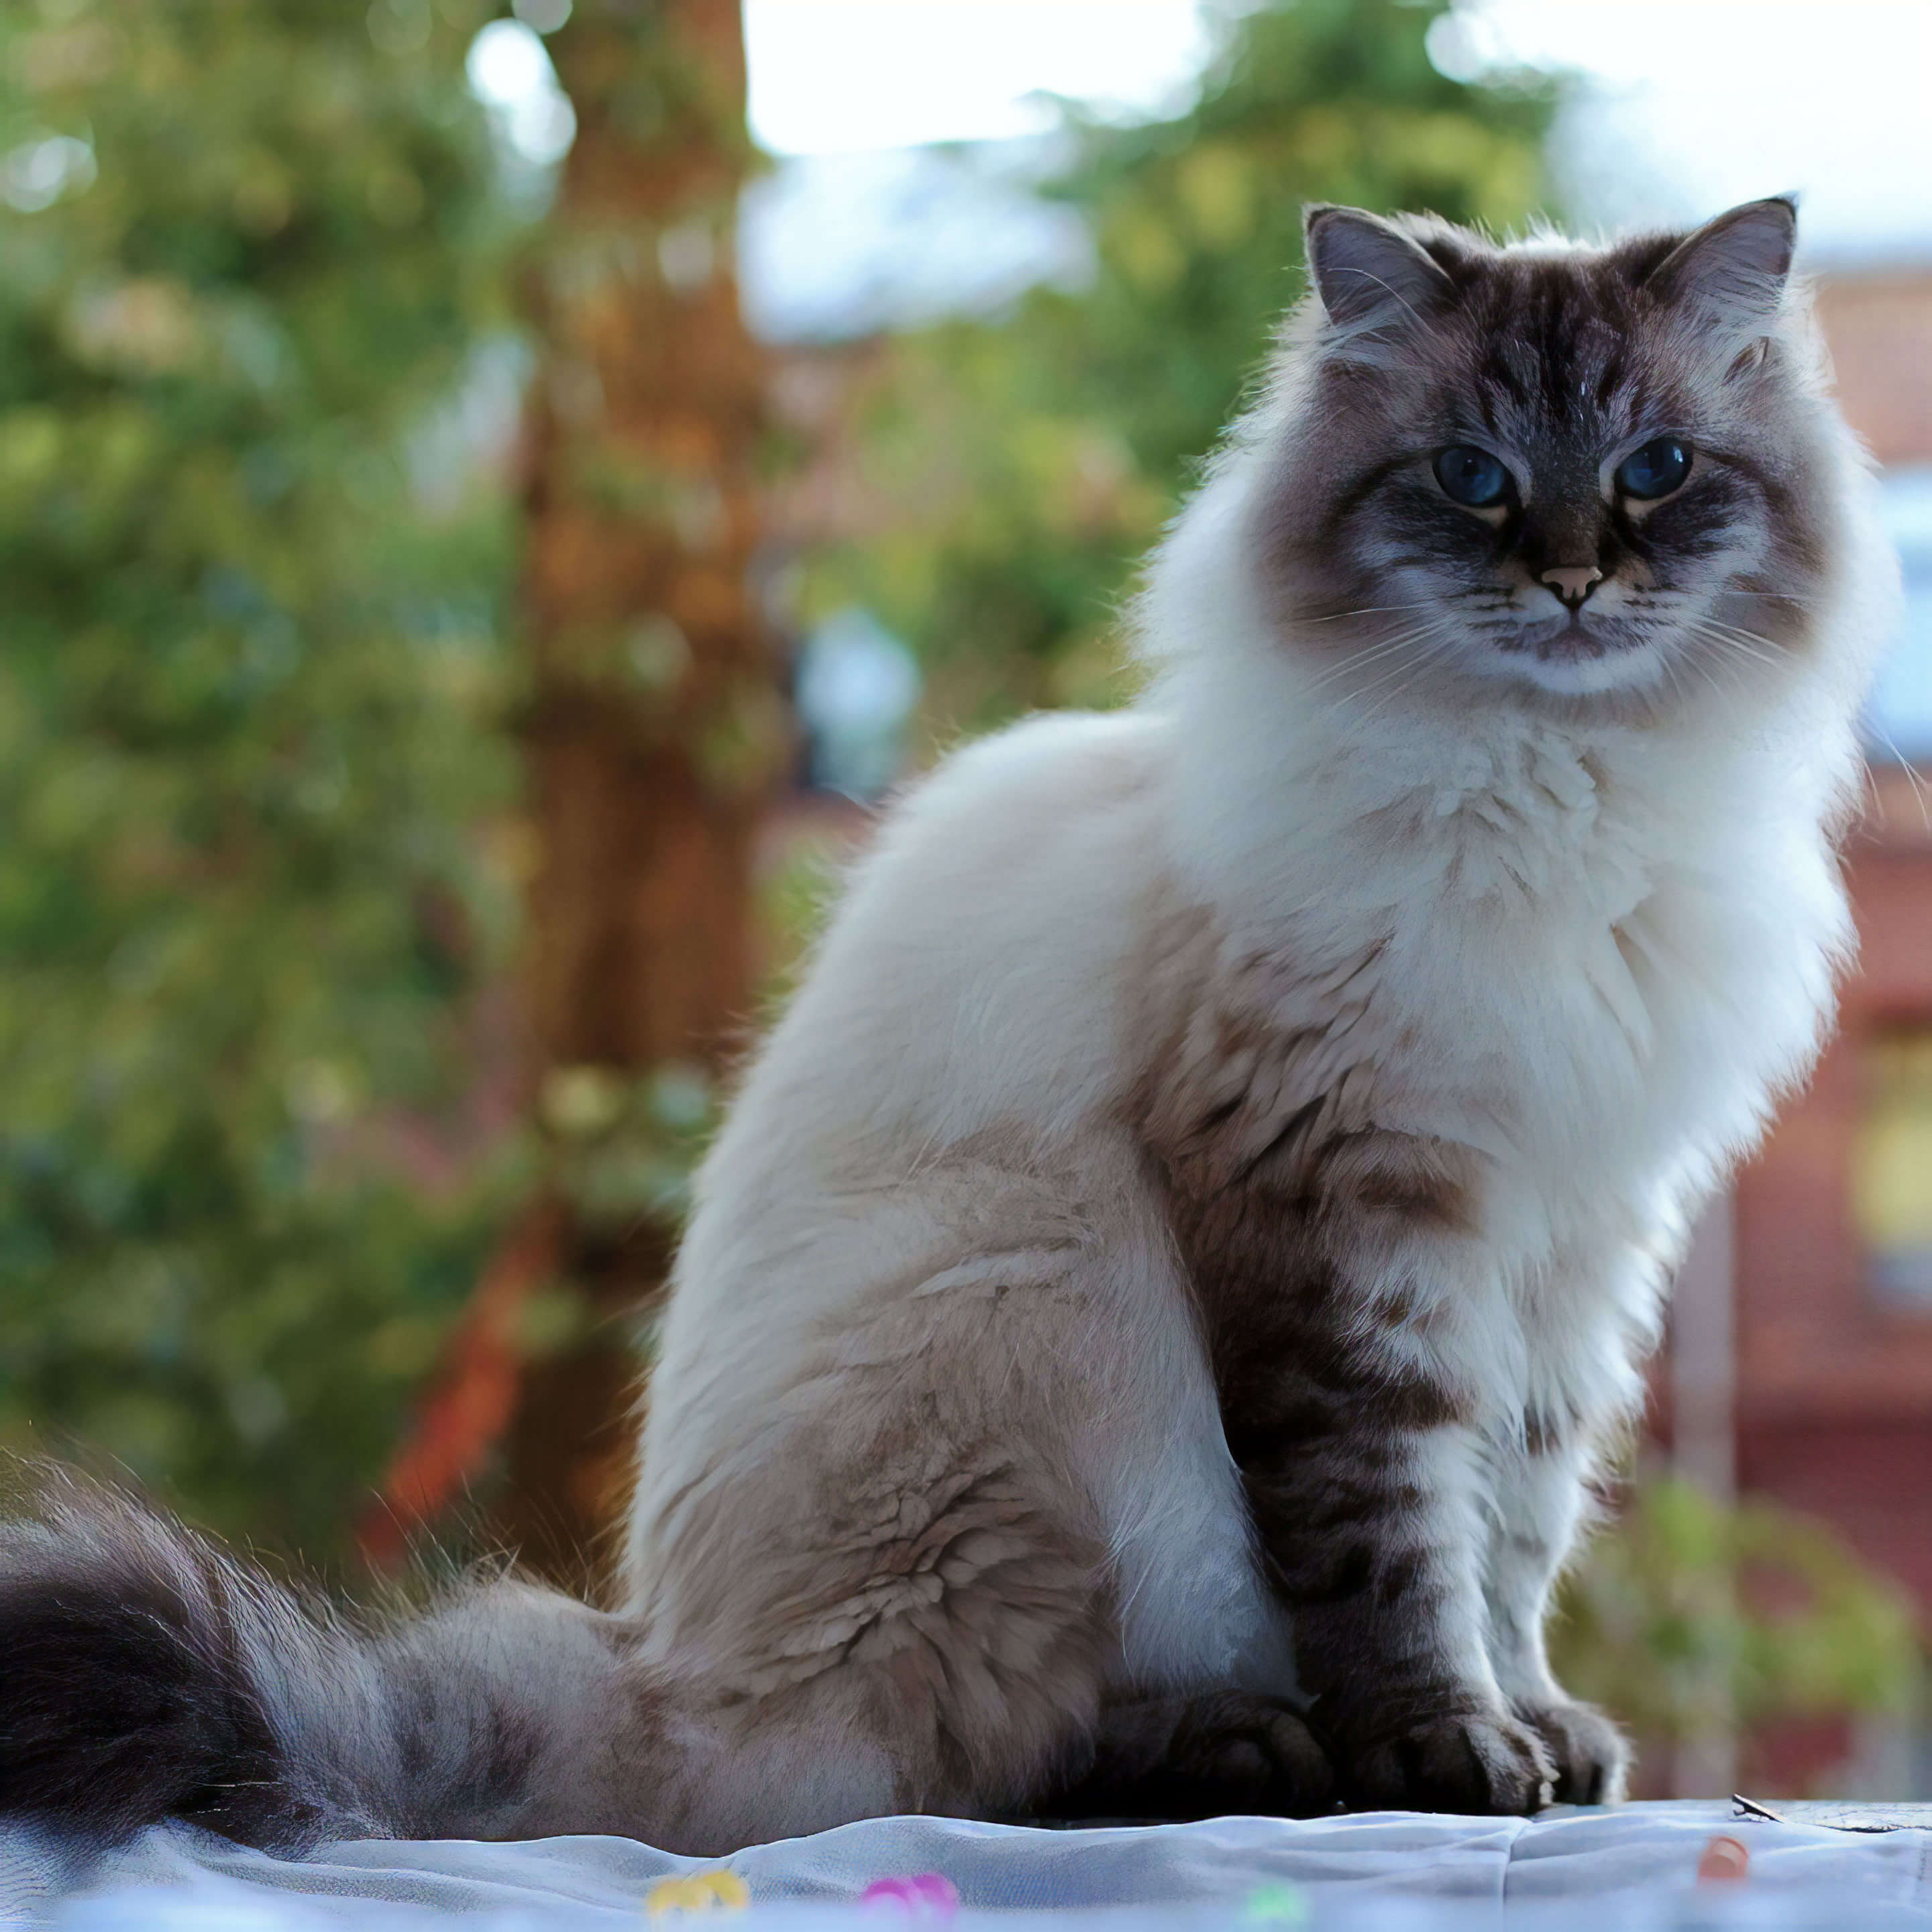
I went with Magic since I wanted to try enlarging the following photo of a magnificent cat.

Processing speed is fairly fast, but it probably depends on the size of the source image in terms of dimensions and color detail.
Once done, you then have the option to download the processed copy of the image (Magic in my case) or delete it.
Results Comparison
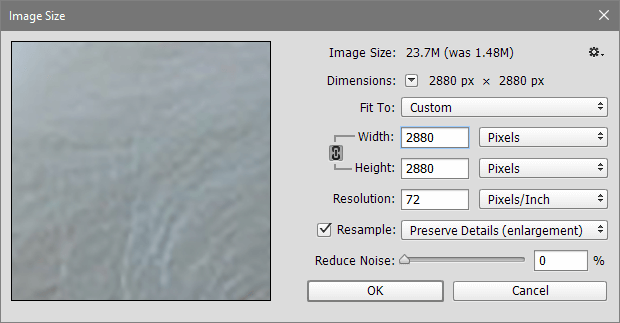
I can’t really think of any other service or software to compare Let’s Enhance with so we’ll go with Photoshop (CC 2014 version) since it’s what I usually use when I need to slightly upscale a photo.
Now I’m no Photoshop image-upscaling pro so I hope you can forgive my shameless reliance on image resizing presets instead of making use of filters and other PS wizardry. Also, I very rarely get myself into cases like this as it’s more of the opposite – I often find myself using PS to downscale images instead.
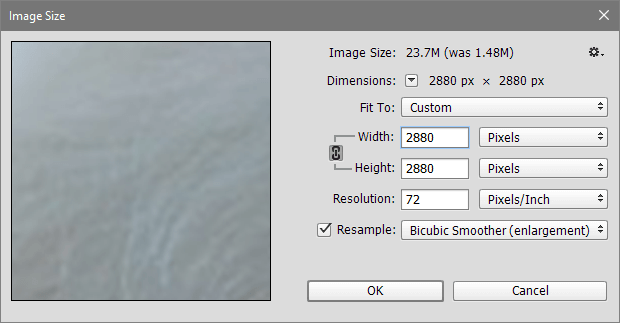
Here are the settings I used for the two Photoshop samples:
Here are the results for all three samples (click on each thumbnail to view image in full screen width), including the one I’ve upscaled through Let’s Enhance:


Depending on the size of the screen you’re reading this blog post on, you may or may not immediately notice the differences. No worries, here’s a zoomed-in, side-by-side version:
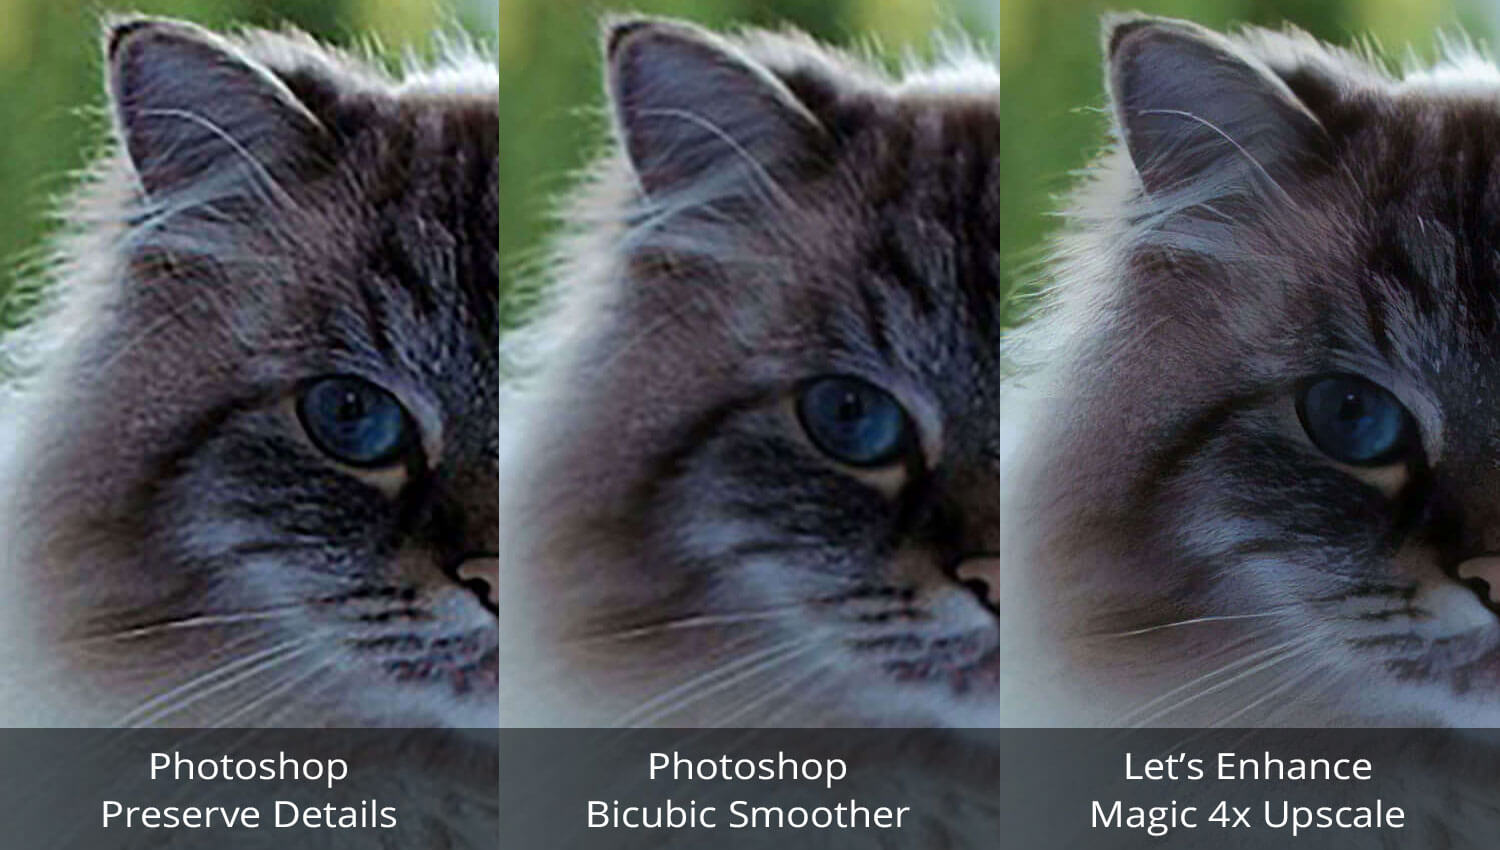
All three seems to have scaled well when zoomed out, but a closer look reveals very significant difference.
The first one has visible loss in sharpness. The second one is the same, though at a glance it briefly makes us think it’s “sharper” than the first one – but it’s not. The edges are just smoothed out.
Now look at the third one, processed through Let’s Enhance. Impressive, right? The details in the cat’s coat and whiskers are still very pronounced, and its eye still looks crystal clear.
Conclusion
For the average user, Let’s Enhance definitely wins when it comes to upscaling photos. Sure, Photoshop power users will perhaps produce better results given enough time but that isn’t even comparable to the few seconds it takes for Let’s Enhance to process the same image.
Overall, the best thing about this is that you can use both Let’s Enhance and Photoshop to produce the best upscaled photo there is.
Hopefully, I’ll also get around testing the Boring processing option since I haven’t really seen a use for it yet given I usually get access to the .ai/vector file format of what I’m working on so upscaling isn’t an issue.
Go try it out for yourself: https://letsenhance.io/
PS: If you’d like to know more useful software like this, check out my Toolbox page.